How to Move pictures in Microsoft Word
You can insert a picture in an exceedingly Microsoft Word document. In fact, you’ll be able to insert, edit, and format as many images as you would like. The app has lots of tools for formatting the document but you may find that images often create problems. once you move a picture around, it generally upsets the format and placement of everything else within the document.
Move pictures in Microsoft Word
Moving pictures in Microsoft Word is difficult. If you are doing not know what layout has been applied to the image, you may not be able to move it without disrupting the format of the remainder of the document.
Picture layouts in Microsoft Word
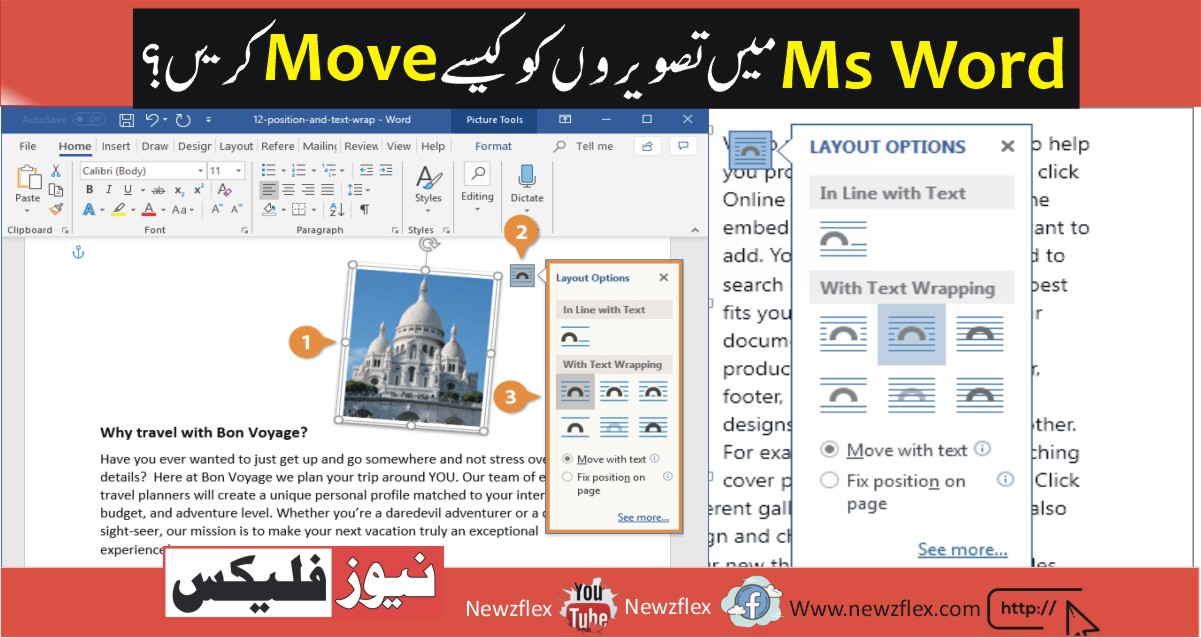
The layout of an image determines how the image will appear relative to the text. the various layouts for an image are:
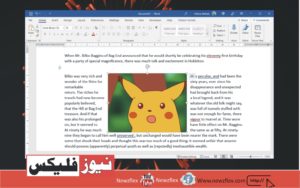
In line with text: The image will appear on its own line next to the text. If the image is large i.e., its height exceeds the road height, it’ll push the subsequent line all the way down to accommodate itself.
With text wrapping – Move with text: The image will appear within the middle of the text i.e., the text will adjust around the image rather than giving it its own line. If the image height exceeds the road height, the following line will appear next thereto and also the image won’t push the subsequent line right down to accommodate its own height. If it’s set to maneuver with text, the image will automatically adjust its position after you add or remove text e.g. if you add a replacement line before the image, it’ll move down.
With text wrapping – Fix position on the page: The image will appear within the middle of the text. If the image height exceeds the road height, the text will appear around it rather than being pushed all the way down to the subsequent line to accommodate the image. If you set the image to a set position on the page, adding or removing the text won’t push the image up or down. Instead, it’ll remain where you placed it and only the text will move.
Text wrapping options
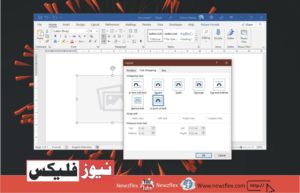
There are additional text wrapping options that you simply can access. they permit you to decide on how text appears around a picture that it’s set to wrap around.
- Select a picture within the document.
- Click the wrapping tool.
- Click See more.
- In the window that opens, move to the Text Wrapping tab.
- For the Square, Tight, Through wrapping options, you’ll be able to choose which side of the image the text will appear.
- For the Behind text option, the text will ‘write over’ the image.
- For the before of text option, the text will write ‘behind’ the image.
How to move pictures in Microsoft Word
Pictures in Microsoft Word will be moved by dragging and dropping. The secret’s to line the proper layout for it. to vary the layout, then move a picture, follow these steps.
- Open a Microsoft Word document.
- Click on the road you wish to feature a picture too.
- Go to Insert>Picture.
- Select a picture and add it to the document.
- Resize/crop/edit the image.
- Click the image in order that it’s selected.
- Click the layout icon or attend the Picture Format tab on the ribbon.
- Select a layout or wrap text option.
- Click the image, and drag and drop it where you would like it to look.
- The image is going to be moved. Text will adjust around it.
The Bottom Line
If once you move a picture, it disrupts the formatting of everything else in a very document then the layout for the image has been set to In line with the text. to stop the image from disrupting the format, choose the Wrap around text layout. you may then be able to move the image around without upsetting the opposite elements of the document. you’ll still have problems with tables since the table height will change to accommodate the image but to figure around that, you ought to change the table’s properties.
مائیکروسافٹ ورڈ میں تصویروں کو کیسے منتقل کریں۔
آپ مائیکروسافٹ ورڈ دستاویز میں ایک تصویر ڈال سکتے ہیں۔ درحقیقت، آپ جتنی تصاویر چاہیں داخل، ترمیم اور فارمیٹ کر سکتے ہیں۔ ایپ میں دستاویز کو فارمیٹ کرنے کے لیے کافی ٹولز موجود ہیں لیکن آپ دیکھیں گے کہ تصاویر اکثر مسائل پیدا کرتی ہیں۔ جب آپ کسی تصویر کو ادھر ادھر منتقل کرتے ہیں، تو یہ عام طور پر دستاویز میں موجود ہر چیز کے فارمیٹ اور پلیسمنٹ کو پریشان کر دیتا ہے۔
مائیکروسافٹ ورڈ میں تصاویر منتقل کریں۔
مائیکروسافٹ ورڈ میں تصاویر کو منتقل کرنا مشکل ہے۔ اگر آپ نہیں جانتے کہ تصویر پر کون سا لے آؤٹ لگایا گیا ہے، تو آپ باقی دستاویز کے فارمیٹ میں خلل ڈالے بغیر اسے منتقل نہیں کر پائیں گے۔
مائیکروسافٹ ورڈ میں تصویر کی ترتیب
تصویر کی ترتیب اس بات کا تعین کرتی ہے کہ تصویر متن کی نسبت کس طرح ظاہر ہوگی۔ تصویر کے لیے مختلف ترتیب یہ ہیں:
متن کے مطابق: تصویر متن کے آگے اپنی لائن پر ظاہر ہوگی۔ اگر تصویر بڑی ہے یعنی اس کی اونچائی لائن کی اونچائی سے زیادہ ہے، تو یہ خود کو ایڈجسٹ کرنے کے لیے اگلی لائن کو نیچے دھکیل دے گی۔

How to move pictures in Microsoft Word
ٹیکسٹ ریپنگ کے ساتھ – متن کے ساتھ منتقل کریں: تصویر متن کے بیچ میں ظاہر ہوگی یعنی متن تصویر کو اپنی لائن دینے کے بجائے اس کے ارد گرد ایڈجسٹ ہو جائے گا۔ اگر تصویر کی اونچائی لائن کی اونچائی سے زیادہ ہے، تو اگلی لائن اس کے آگے ظاہر ہوگی اور تصویر اپنی اونچائی کو ایڈجسٹ کرنے کے لیے اگلی لائن کو نیچے نہیں دھکیلے گی۔ اگر اسے متن کے ساتھ منتقل کرنے پر سیٹ کیا گیا ہے، تو جب آپ متن کو شامل کرتے یا ہٹاتے ہیں تو تصویر خود بخود اپنی پوزیشن کو ایڈجسٹ کر لے گی۔ اگر آپ تصویر سے پہلے ایک نئی لائن شامل کرتے ہیں، تو یہ نیچے چلی جائے گی۔
ٹیکسٹ ریپنگ کے ساتھ – صفحہ پر پوزیشن درست کریں: تصویر متن کے بیچ میں ظاہر ہوگی۔ اگر تصویر کی اونچائی لائن کی اونچائی سے زیادہ ہے، تو متن تصویر کو ایڈجسٹ کرنے کے لیے اگلی لائن تک نیچے دھکیلنے کے بجائے اس کے ارد گرد ظاہر ہوگا۔ اگر آپ تصویر کو صفحہ پر ایک مقررہ پوزیشن پر سیٹ کرتے ہیں، تو متن کو شامل کرنے یا ہٹانے سے تصویر اوپر یا نیچے نہیں جائے گی۔ اس کے بجائے، یہ وہیں رہے گا جہاں آپ نے اسے رکھا ہے اور صرف متن منتقل ہوگا۔
How to move pictures in Microsoft Word
ٹیکسٹ ریپنگ کے اختیارات
ٹیکسٹ ریپنگ کے اضافی اختیارات ہیں جن تک آپ رسائی حاصل کر سکتے ہیں۔ وہ آپ کو یہ منتخب کرنے کی اجازت دیتے ہیں کہ کسی تصویر کے ارد گرد متن کس طرح ظاہر ہوتا ہے جس کے ارد گرد لپیٹنے کے لیے سیٹ کیا گیا ہے۔
نمبر 1: دستاویز میں ایک تصویر منتخب کریں۔
نمبر 2: ریپنگ ٹول پر کلک کریں۔
نمبر 3: مزید دیکھیں پر کلک کریں۔
نمبر 4: کھلنے والی ونڈو میں، ٹیکسٹ ریپنگ ٹیب پر جائیں۔
نمبر 5: اسکوائر، ٹائٹ، تھرو ریپنگ آپشنز کے لیے، آپ یہ منتخب کر سکتے ہیں کہ تصویر کے کس طرف متن ظاہر ہوگا۔
نمبر 6: متن کے پیچھے والے آپشن کے لیے، متن تصویر پر ‘لکھ جائے گا’۔
نمبر 7: ٹیکسٹ کے سامنے والے آپشن کے لیے، ٹیکسٹ تصویر کے پیچھے ‘بیک’ لکھے گا۔
How to move pictures in Microsoft Word
مائیکروسافٹ ورڈ میں تصویروں کو کیسے منتقل کریں۔
مائیکروسافٹ ورڈ میں تصاویر کو گھسیٹ کر اور چھوڑ کر منتقل کیا جا سکتا ہے۔ کلید اس کے لیے صحیح ترتیب ترتیب دینا ہے۔ لے آؤٹ کو تبدیل کرنے کے لیے، اور پھر تصویر کو منتقل کرنے کے لیے، ان مراحل پر عمل کریں۔
نمبر 1: مائیکروسافٹ ورڈ دستاویز کھولیں۔
نمبر 2: اس لائن پر کلک کریں جس میں آپ تصویر شامل کرنا چاہتے ہیں۔
نمبر 3: انسرٹ پکچر پر جائیں۔
نمبر 4: ایک تصویر منتخب کریں اور اسے دستاویز میں شامل کریں۔
نمبر 5: تصویر کا سائز تبدیل کریں/کاٹیں/ترمیم کریں۔
نمبر 6: تصویر پر کلک کریں تاکہ یہ منتخب ہو جائے۔
نمبر 7: لے آؤٹ آئیکن پر کلک کریں یا ربن پر پکچر فارمیٹ ٹیب پر جائیں۔
نمبر 8: لے آؤٹ یا ریپ ٹیکسٹ آپشن کو منتخب کریں۔
نمبر 9: تصویر پر کلک کریں، اور جہاں آپ اسے دکھانا چاہتے ہیں اسے گھسیٹ کر چھوڑیں۔
نمبر 10: تصویر کو منتقل کر دیا جائے گا۔ متن اس کے ارد گرد ایڈجسٹ ہو جائے گا
نتیجہ
اگر، جب آپ کسی تصویر کو منتقل کرتے ہیں، تو یہ کسی دستاویز میں موجود ہر چیز کی فارمیٹنگ میں خلل ڈالتا ہے، تو تصویر کا لے آؤٹ متن کے ساتھ لائن پر سیٹ کر دیا گیا ہے۔ تصویر کو فارمیٹ میں خلل ڈالنے سے روکنے کے لیے، ٹیکسٹ لے آؤٹ کے ارد گرد لپیٹ کا انتخاب کریں۔ اس کے بعد آپ دستاویز کے دیگر عناصر کو پریشان کیے بغیر تصویر کو ادھر ادھر منتقل کر سکیں گے۔ آپ کو ابھی بھی ٹیبلز کے ساتھ مسائل ہو سکتے ہیں کیونکہ تصویر کو ایڈجسٹ کرنے کے لیے ٹیبل کی اونچائی تبدیل ہو جائے گی لیکن اس کے ارد گرد کام کرنے کے لیے، آپ کو ٹیبل کی خصوصیات کو تبدیل کرنا چاہیے۔